Samples
The package includes 26 sample scenes covering animation playback, scripting, physics, procedural animation, and integrations. Each numbered folder contains a main scene and an ECS SubScene.
Installation
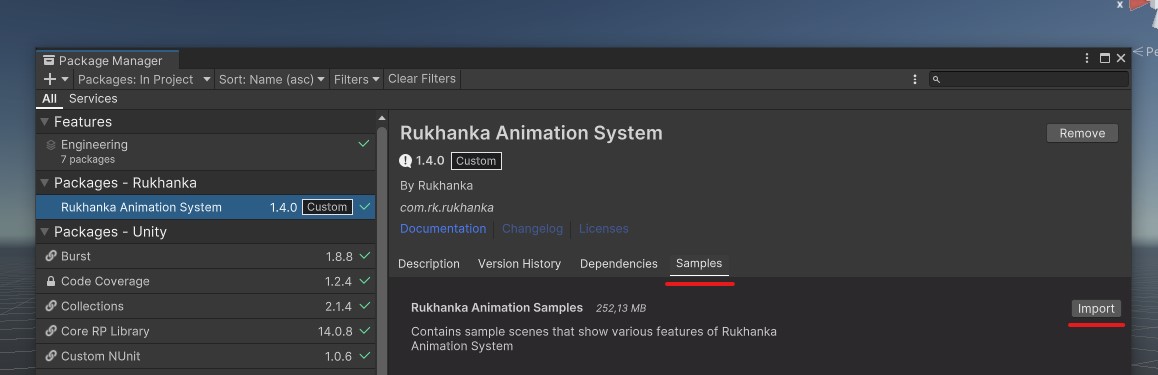
- Open Window > Package Manager and select Rukhanka Animation System 2.
- In the Samples tab, import Rukhanka Animation Samples.
- Open the imported
Scenesfolder underAssets/Samples/Rukhanka Animation System 2/<version>/Rukhanka Animation Samples/. - Open a main scene from the list below, wait for imports and SubScene baking to finish, then enter Play mode.
Open the main scene rather than Subscene_ECS.unity: the main scene provides the camera, lighting, and sample UI, while its SubScene contains the ECS authoring objects. Inspect the SubScene when studying how a rig or feature is configured.
Requirements
Start with the prerequisites in Getting Started. Use URP or HDRP with Entities Graphics and materials configured for your render pipeline; see Shaders with Deformation if a model renders incorrectly.
The samples use Unity's Input System package for input. Install it and enable the new Input System in Active Input Handling before trying keyboard or mouse controls.
Install Visual Effect Graph for the included particle effects. The event sample references VisualEffect directly in the shared sample assembly, so keep this package installed when importing the complete sample set, even if you open a different scene.
Some scenes need additional packages or configuration:
| Samples | Additional requirements |
|---|---|
| 13. Netcode Demo | Netcode for Entities (com.unity.netcode) and the RUKHANKA_WITH_NETCODE scripting define symbol. See Working with Netcode. |
| 16. Physics Interactions and 17. Ragdoll | Unity Physics (com.unity.physics). Use the CPU Animator for bone interaction with physics. |
| 18. Inverse Kinematics and 24. Procedural Animation | Use the CPU Animator for IK and procedural pose changes. |
| 19. Animation and Animator Events | Visual Effect Graph (com.unity.visualeffectgraph) for the event-driven particle effects. |
| 25. Character Controller | Character Controller (com.unity.charactercontroller) and its physics dependencies. The sample provides an Install Character Controller button in the Editor if the package is missing. See the sample-specific Netcode restriction below. |
| 26. VFX Skinned Mesh Sampling | Unity 6.0 or newer and Visual Effect Graph (com.unity.visualeffectgraph). |
The sample assembly detects optional packages through version defines. RUKHANKA_WITH_NETCODE is a separate, project-level opt-in for Rukhanka Animation's network synchronization.
When comparing CPU and GPU animation, check Animation Engines first. Features such as user curves, root motion, blend shapes, and bone transform writeback require the CPU Animator.
Scene Guide
Scene paths below are relative to the imported Scenes folder. The folder numbers match the shipped samples.
| Folder | Main scene | What to explore |
|---|---|---|
1. Basic Animation | BasicAnimation.unity | Rig setup and clip playback |
2. Bone Attachment | Bone Attachment.unity | Objects following animated bones |
3. Animator Parameters | Animator Parameters.unity | Controlling a state machine from UI |
4. BlendTree Showcase | BlendTree Showcase.unity | Blend tree types |
5. Avatar Mask | Avatar Mask.unity | Restricting animation to selected bones |
6. Multiple Blend Layers | Multiple Animator Layers.unity | Layer blending |
7. User Curves | User Curves.unity | Animation curves driving parameters |
8. Root Motion | Root Motion.unity | Movement extracted from animation |
9. Animator Override Controller | Animator Override Controller.unity | Replacing clips in an existing controller |
10. Non Skinned Mesh Animation | Non Skinned Mesh Animation.unity | Animating an entity hierarchy |
11. Crowd | Crowd Sample.unity | Spawning animated models and switching engines |
12. Stress Test | Stress Test Sample.unity | Animation performance with simpler rendering |
13. Netcode Demo | Netcode Demo.unity | Local, predicted, and interpolated entities |
14. Animator State Query | AnimatorStateQuery.unity | Reading state and transition information |
15. Humanoid Animations | HumanoidAnimations.unity | Humanoid rigs and animation controls |
16. Physics Interactions | SimplePhysics.unity | Physics bodies on animated bones |
17. Ragdoll | Ragdoll.unity | Physics driving bone poses |
18. Inverse Kinematics | IK.unity | Aim, transform override, FABRIK, and two-bone IK |
19. Animation and Animator Events | AnimationAndAnimatorEvents.unity | Responding to clip and controller events |
20. Animation Culling | AnimationCulling.unity | Frustum culling and animated bounds |
21. Scripted Controller | ScriptedController.unity | Submitting clips without an Animator Controller |
22. Blend Shapes | BlendShapes.unity | Animating blend shape weights |
23. Runtime Skinned Mesh Swap | RuntimeMeshSwap.unity | Switching modular body parts |
24. Procedural Animation | ProceduralAnimation.unity | Dynamic bone chains and procedural stepping |
25. Character Controller | CharacterController.unity | Locomotion and hit reactions |
26. VFX Skinned Mesh Sampling | VFXWithSkinnedMesh.unity | Sampling the deformed mesh in VFX Graph |
Basic Animation
This scene is the starting point for learning the setup described in Getting Started. Several models each play a single animation. Inspect their authoring objects in the SubScene to see the relationship between the rig definition, Animator Controller, and animation clips.
Bone Attachment
This scene demonstrates objects following animated bones. With the CPU Animator, parent an attachment to the required bone GameObject; Rukhanka Animation updates the corresponding bone entity transform during animation.
GPU attachments need a compatible attachment shader and GPU Attachment Authoring. See Bone Attachments for both setup paths.
Animator Parameters
Use the scene UI to change parameters and observe the resulting state-machine behavior. The sample connects GameObject UI controls to ECS animation parameters. See Animator Parameters for the runtime API.
BlendTree Showcase
Use the in-game UI to change blend values and compare the supported blend tree types: Direct, 1D, 2D Simple Directional, 2D Freeform Directional, and 2D Freeform Cartesian. Inspect the associated Animator Controllers to see how each tree is authored.
Avatar Mask
This scene demonstrates restricting animation to selected bones with an Avatar Mask. Author the mask and assign it in the Animator Controller; Rukhanka Animation converts it during baking. Avatar masks are supported for both generic and humanoid animation.
Multiple Blend Layers
This scene demonstrates an Animator Controller with two layers. Inspect the controller's layer configuration and compare the resulting poses. Rukhanka Animation supports Override and Additive layers with layer weights; masks can further restrict which bones a layer affects.
User Curves
An animation curve drives an Animator parameter with the same name. In this example, the parameter controls animation speed, so the clip changes its own playback speed. Use the CPU Animator and see User Curves for the setup rules.
Root motion
This scene demonstrates using movement from an animation to move the animated entity. Use the CPU Animator. See Root Motion for configuration and supported behavior.
Animator Override Controller
An Animator Override Controller replaces clips while retaining the original controller's state-machine structure. Use the scene's override toggle to compare the original and replacement animations; the UI lists the clips currently in use.
Non-Skinned Mesh Animation
This scene animates an entity hierarchy without a skinned mesh. Inspect the authoring hierarchy and animation bindings to see how transform animation applies to individual entities. See Non-skinned Meshes for setup details.
Crowd
Spawn and despawn animated prefabs with the scene UI. Compare CPU, GPU, and camera-distance-based mixed animation modes; mixed mode exposes a switch distance. The counters show instance, bone, and skinned vertex counts.
Skeleton visualization requires RUKHANKA_DEBUG_INFO. Start with a small population, then increase it while profiling to distinguish animation, deformation, and rendering costs.
Stress Test
This scene uses the crowd-spawning approach with simple cubes instead of detailed skinned models. The simpler rendering workload makes animation costs easier to study. Compare it with Crowd at similar instance counts; use profiler timings rather than treating the frame rate as an isolated animation benchmark.
Netcode Demo
This scene demonstrates animation synchronization with Netcode for Entities. Install the package and define RUKHANKA_WITH_NETCODE before running it. See Working with Netcode for ghost configuration.
The sample distinguishes three types of objects:
-
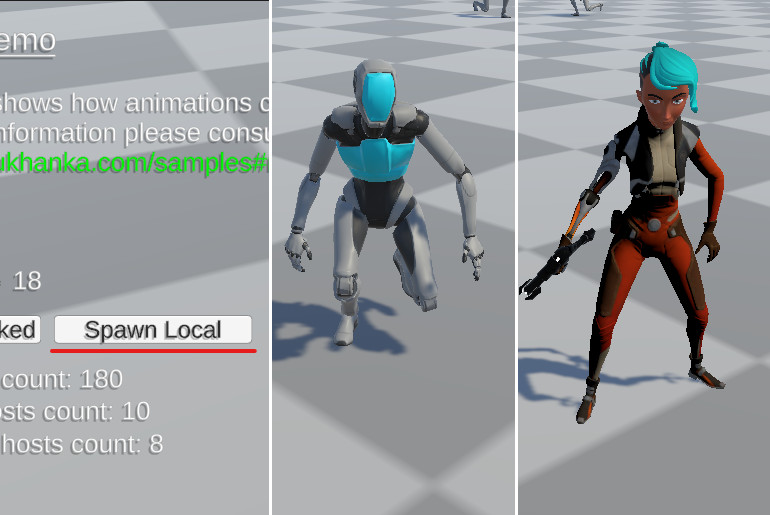
Local client only: created with Spawn Local. These entities exist only on the client and are not synchronized with the server. They use the default material colors.
-
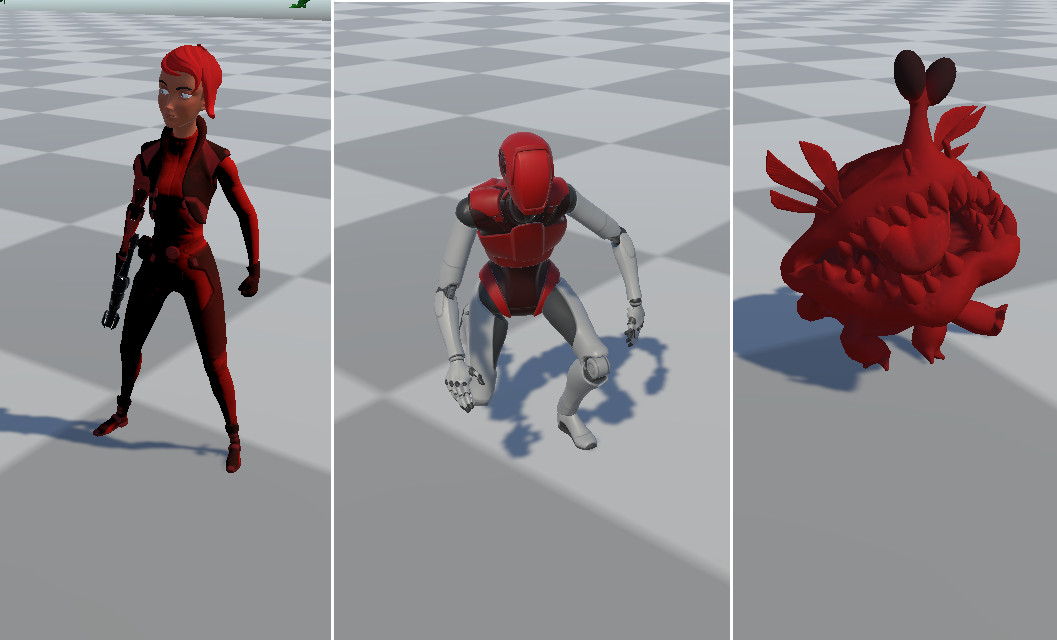
Interpolated ghosts: networked entities with red-tinted materials.
-
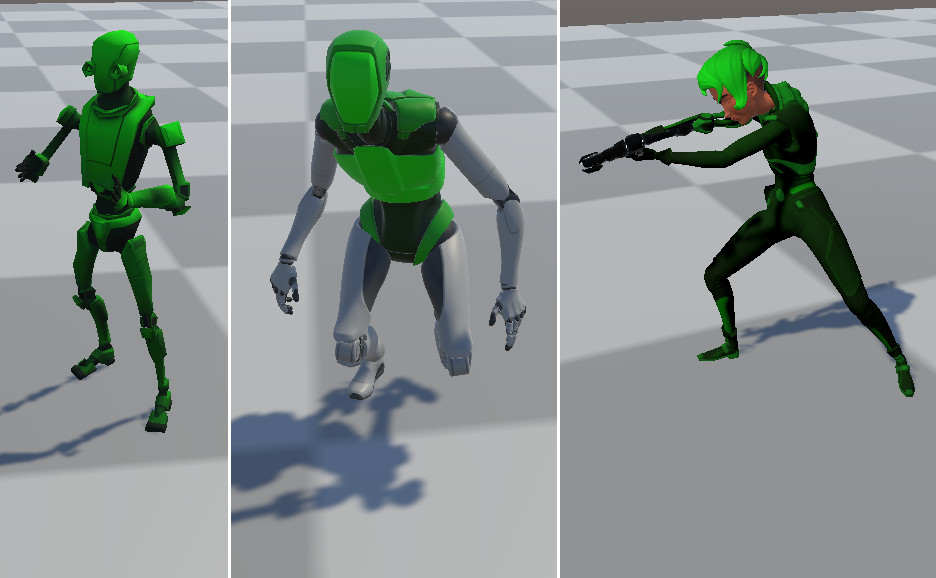
Predicted ghosts: networked entities with green-tinted materials.
Use Spawn Networked to request networked objects from the server:
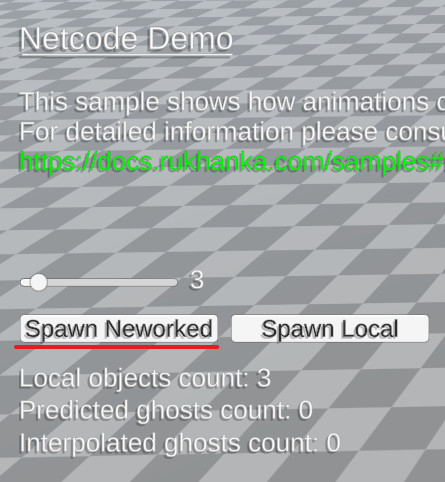
In the Netcode PlayMode Tools, select a mode that creates both client and server worlds for a single-Editor test. The sample bootstrap uses port 7979 for automatic connection. Simulate latency and packet loss to compare predicted and interpolated animation.
For a test with separate processes, build the demo as a client/server instance, run it, then configure the Editor as a client connecting to 127.0.0.1:7979 on the same machine:
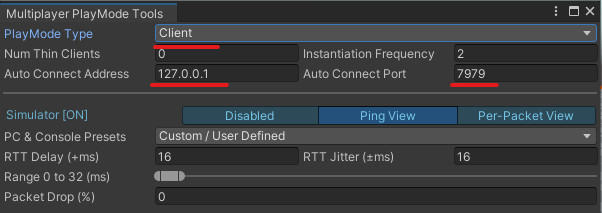
Spawn networked prefabs from either client and observe replication to the other. Local-only spawns remain on the client that created them.
Animator State Query
This scene reads the current Animator state and transition information each frame and displays it in the UI. Use it as a reference for inspecting a running state machine through the runtime query API. See Animator State Query.
Humanoid Animations
This scene demonstrates humanoid avatars and animation playback. Change the UI controls to alter the state machines and observe the sample models. Inspect the model avatars and controllers alongside Getting Started when setting up your own humanoid rig.
Simple Physics
Located in 16. Physics Interactions, this scene demonstrates physics bodies attached directly to animated bones. Unity Physics can unparent bone entities, and Rukhanka Animation's CPU Animator can still update their animated transforms.
Put a physics body on the bone itself, rather than on a child that loses its bone relationship when unparented. See Working with Physics.
Ragdoll
This scene contains a preconfigured physics ragdoll. When animation does not drive a bone, its entity transform can supply the bone pose, allowing physics to drive the rig. Inspect the bone bodies and joints in the SubScene. This sample requires Unity Physics and the CPU Animator; see Working with Physics.
Inverse Kinematics
Use the scene's Aim, Override Transform, FABRIK, and Two Bone views to compare the available solvers. Adjust the weight controls to blend their effect with the animated pose. The SubScene shows the target entities and authoring components used by each example.
IK requires the CPU Animator. See Inverse Kinematics for solver configuration.
Animation and Animator Events
This scene demonstrates both animation clip events and Animator Controller events. Clip events spawn indicator particles; controller events change their color. Inspect Scripts/SampleEventReactionSystem.cs in this sample folder for the ECS event handling.
See Animation Events and Animator Controller Events for the two event APIs.
Animation Culling
This scene demonstrates skipping animation calculation for models outside the camera frustum, together with animated skinned mesh bounds recalculation. Use it to study how visibility and bounds affect animation processing.
See Animation Frustum Culling and Bounding Box Recalculation. Bounds recalculation requires the CPU Animator, while animation frustum culling supports both engines.
Scripted Controller
This scene submits animation clips from code without a Mecanim Animator Controller. Switch between Single Animation and Animation Blending, select clips, and change their weight or blend factor. Enable manual time control to inspect a specific point in a clip.
Start with Scripts/ScriptedAnimatorSampleSystem.cs in this sample folder and see Working without Animator for authoring and baking requirements.
Blend Shapes
This scene demonstrates animation clips driving blend shape weights on a skinned mesh. Use the CPU Animator and deformation-aware materials. See Blend Shapes for model and clip preparation.
Runtime Skinned Mesh Replacement
Located in 23. Runtime Skinned Mesh Swap, this scene demonstrates attaching skinned mesh parts from separate prefabs to an existing animated rig. Use the UI buttons to cycle heads, bodies, and arms while animation continues.
Scripts/ModularRigInitPartsSystem.cs instantiates the parts and assigns their rig references. Scripts/UI/UIController_RuntimeSkinnedMeshSwitch.cs, under the imported sample root, switches the active parts. Since v2.6, the default skinned mesh layout keeps rendering data on the skinned mesh entity; One Entity Per Submesh can split it into multiple entities. Study the sample's rig references and enabled-state handling rather than treating replacement as a GameObject mesh assignment.
Procedural Animation
This scene has two stages, selected with the Dynamic Bone Chain and Leg Animator buttons. Both use the CPU Animator.
- Dynamic Bone Chain: adjust Inertia, Damping, Elasticity, and Stiffness to observe how a simulated bone chain responds to motion.
Scripts/DynamicBoneChainSampleSystems.csapplies the UI values to the chain components. - Leg Animator: a six-legged walker demonstrates procedural stepping through two-bone IK targets. Adjust Step Distance, Step Height, Step Duration, and Body Speed. Set body speed to zero to stop the body's motion and inspect foot placement.
Scripts/LegAnimatorSampleAuthoring.cscontains the sample's body movement and parameter updates.
The leg animator alternates support groups and maintains planted feet as the body moves and turns. It uses an authored rest plane and does not raycast against terrain. See Procedural Animation for the authoring components and gait setup.
Character Controller
This scene connects Unity's ECS Character Controller to an Animator Controller. Movement, grounded state, and velocity drive animation parameters; cannonball contacts trigger directional hit reactions.
Install Character Controller and use WASD to move and F to shoot a ball. Inspect Scripts/CharacterController.cs in this sample folder for parameter updates and collision reactions.
This particular sample displays a warning when Netcode for Entities and Unity Physics are installed together and asks you to remove Netcode for Entities. Run it in a project without Netcode for Entities. Use 13. Netcode Demo to explore network animation.
VFX Skinned Mesh Sampling
This scene samples the animated, deformed mesh in Visual Effect Graph using a custom HLSL node. It demonstrates feeding the current deformed mesh index into a VisualEffect so particles can follow the animated surface.
Inspect Scripts/VFXSkinnedMeshSamplerAuthoring.cs, Scripts/VFXSkinnedMeshSamplerSystem.cs, and Assets/SkinnedMeshSampler.hlsl in this sample folder for the connection between the entity, mesh data, and VFX Graph.
This sample requires Unity 6.0 or newer and the Visual Effect Graph package. Its custom HLSL node is not supported by earlier Unity versions.